Hey there! As an indoor WPC panel supplier, I've seen firsthand how these panels can transform the look and feel of any indoor space. Today, I'm gonna walk you through the process of installing indoor WPC panels on wooden frames. It's not as complicated as it might seem, and with the right tools and a bit of know - how, you can achieve a professional - looking finish.
Step 1: Gather Your Materials and Tools
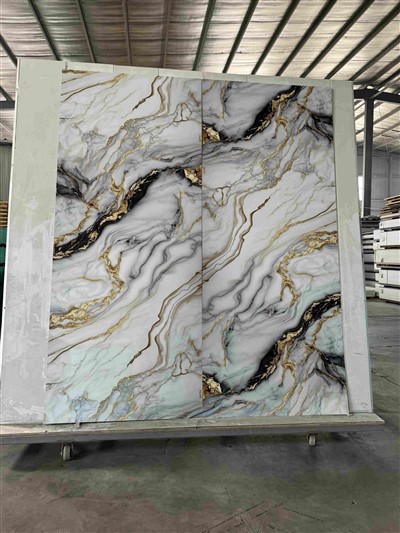
Before you start the installation, you need to make sure you have everything you need. First off, you'll obviously need the indoor WPC panels. We offer a great selection, like the Cheap Price Home Decoration UV Marble Sheet, which looks super stylish and is very affordable.
You'll also need wooden frames. Make sure they're straight and in good condition. Other materials include screws, glue, and a measuring tape. As for tools, a drill, a saw, a level, and a hammer are essential. Having a utility knife on hand is also a good idea for any minor adjustments.


Step 2: Prepare the Wooden Frames
The wooden frames are the backbone of your WPC panel installation. Start by measuring the area where you want to install the panels. Cut the wooden frames to the appropriate lengths using a saw. Make sure all the cuts are clean and straight.
Once you've cut the frames, use a level to ensure they're perfectly horizontal and vertical. You can use shims to adjust the frames if they're not level. After that, attach the frames to the wall using screws. Make sure they're securely fastened, as this will prevent the panels from sagging or coming loose later on.
Step 3: Plan the Panel Layout
Before you start installing the panels, it's a good idea to plan out the layout. Lay the panels on the floor near the installation area to see how they'll fit together. You might want to start from a corner or a focal point in the room.
Consider the pattern you want to create. Some people prefer a simple, straight - up - and - down installation, while others like a more decorative pattern. Take your time to experiment with different arrangements until you find the one that suits your taste.
Step 4: Install the First Panel
Now it's time to start installing the panels. Begin with the first panel. Apply a thin layer of glue to the back of the panel where it will come into contact with the wooden frame. Then, carefully place the panel on the frame and align it with the markings you made during the layout planning.
Use a drill to attach the panel to the frame with screws. Make sure the screws are evenly spaced and not too tight, as this could cause the panel to crack. If you're using a tongue - and - groove system, which is common with WPC panels, make sure the panels fit together snugly.
Step 5: Continue Installing the Panels
Once the first panel is in place, it's time to install the rest. Repeat the process of applying glue and attaching the panels to the frame. As you install each panel, check for alignment and make sure they're level.
If you need to cut a panel to fit around an obstacle like a window or a door, use a saw. Measure twice and cut once to ensure an accurate fit. You can also use a utility knife to trim any excess material.
Step 6: Finish the Installation
After all the panels are installed, take a step back and check for any gaps or unevenness. If you find any, you can use filler or caulk to fill them in. Sand the edges of the panels to smooth out any rough spots.
Finally, clean the panels with a mild detergent and a soft cloth to remove any dirt or glue residue. Now your indoor space is transformed with beautiful WPC panels!
Step 7: Maintenance Tips
Once the installation is complete, it's important to know how to maintain your WPC panels. They're relatively low - maintenance, but a little care goes a long way.
Avoid using abrasive cleaners, as these can scratch the surface of the panels. Instead, use a soft cloth and a mild detergent for regular cleaning. If there are any stains, you can try using a specialized cleaner for WPC materials.
Why Choose Our Indoor WPC Panels?
As a supplier, we take pride in offering high - quality indoor WPC panels. Our 204*28 INDOOR WALL PANEL is a popular choice among our customers. It's durable, easy to install, and comes in a variety of colors and designs.
We also offer Factory Wholesale WPC Wall Panel For Indoor, which means you can get great - quality panels at a competitive price. Whether you're a DIY enthusiast or a professional contractor, our panels are a great option for your indoor projects.
Contact Us for Your Next Project
If you're interested in purchasing our indoor WPC panels or have any questions about the installation process, don't hesitate to get in touch. We're here to help you every step of the way, from choosing the right panels to providing technical support.
Transform your indoor space with our high - quality WPC panels. Contact us today to start your project!
References
- "WPC Panel Installation Guide" - General industry resource on WPC panel installation.
- "Wooden Frame Construction Basics" - A guide on building and preparing wooden frames for various applications.