Hey there! As a supplier of SPC wall panels, I've seen firsthand how these panels can transform a wooden wall into a stylish and durable surface. In this blog post, I'll walk you through the process of installing SPC wall panels on a wooden wall, step by step.
What You'll Need
Before you start the installation process, it's important to gather all the necessary tools and materials. Here's a list of what you'll need:
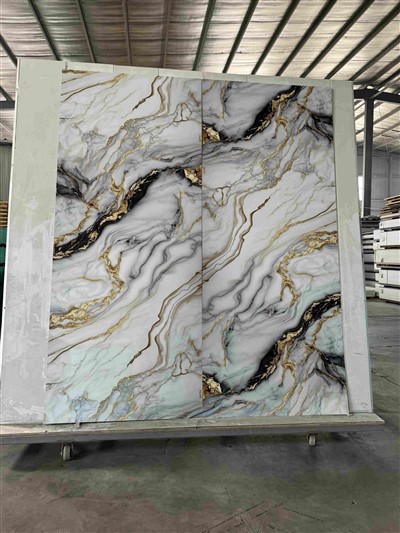
- SPC Wall Panels: You can choose from a variety of options, such as the Matt SPC Wall Panel or the PET Glossy SPC Wall Panel. Make sure to measure your wall accurately and purchase enough panels to cover the entire surface.
- Measuring Tape: To measure the wall and cut the panels to the correct size.
- Utility Knife: For cutting the panels.
- Jigsaw: If you need to make curved cuts or cut out holes for outlets or switches.
- Level: To ensure that the panels are installed straight.
- Adhesive: A high-quality adhesive specifically designed for SPC wall panels.
- Caulk Gun: To apply the adhesive.
- Spacers: To maintain a consistent gap between the panels.
- Screwdriver: If you're using screws to secure the panels.
- Safety Gear: Gloves, safety glasses, and a dust mask to protect yourself during the installation process.
Preparing the Wooden Wall
The first step in installing SPC wall panels is to prepare the wooden wall. Here's what you need to do:
- Clean the Wall: Use a damp cloth to remove any dirt, dust, or debris from the wall. Make sure the wall is completely dry before proceeding.
- Repair Any Damage: Inspect the wall for any cracks, holes, or other damage. Repair these areas using wood filler or spackling compound, and sand them smooth once they're dry.
- Sand the Wall: Lightly sand the wall to create a rough surface that will help the adhesive bond better. Wipe away any dust with a clean cloth.
- Measure and Mark the Wall: Use a measuring tape to measure the height and width of the wall. Mark the center of the wall horizontally and vertically with a pencil. This will help you align the panels properly during installation.
Cutting the SPC Wall Panels
Once the wall is prepared, it's time to cut the SPC wall panels to the correct size. Here's how to do it:
- Measure the Panels: Measure the height and width of the wall, and subtract a small amount (usually about 1/8 inch) to allow for expansion and contraction. Mark the measurements on the back of the panels using a pencil.
- Cut the Panels: Use a utility knife or a jigsaw to cut the panels along the marked lines. If you're using a utility knife, score the panel several times along the line, and then snap it along the scored line. If you're using a jigsaw, use a fine-tooth blade to make a smooth cut.
- Test the Fit: Place the cut panels against the wall to make sure they fit properly. Make any necessary adjustments to the size or shape of the panels.
Applying the Adhesive
Now that the panels are cut to size, it's time to apply the adhesive. Here's what you need to do:
- Read the Instructions: Before applying the adhesive, read the manufacturer's instructions carefully. Make sure you understand the application process and the drying time.
- Apply the Adhesive: Use a caulk gun to apply a thin, even layer of adhesive to the back of the panel. Start at the top of the panel and work your way down, applying the adhesive in a zigzag pattern. Make sure to cover the entire surface of the panel, but avoid applying too much adhesive.
- Spread the Adhesive: Use a notched trowel to spread the adhesive evenly over the back of the panel. This will help create a strong bond between the panel and the wall.
- Apply the Panel: Carefully place the panel against the wall, starting at the center mark. Press the panel firmly against the wall, using a level to make sure it's straight. Use spacers to maintain a consistent gap between the panels.
- Secure the Panel: If you're using screws to secure the panels, insert the screws through the pre-drilled holes in the panel and into the wall. Make sure the screws are tightened securely, but don't overtighten them.
Installing the Remaining Panels
Once the first panel is installed, it's time to install the remaining panels. Here's how to do it:


- Align the Panels: Place the next panel against the first panel, making sure the edges are aligned. Press the panel firmly against the wall, using a level to make sure it's straight. Use spacers to maintain a consistent gap between the panels.
- Join the Panels: Use a tapping block and a rubber mallet to gently tap the panels together, making sure they fit snugly. If the panels don't fit together properly, you may need to trim them slightly.
- Continue Installing the Panels: Repeat the process of applying adhesive, placing the panel against the wall, and joining the panels together until the entire wall is covered.
- Cut and Install the Final Panel: When you reach the end of the wall, you may need to cut the final panel to fit. Measure the remaining space, and cut the panel to the correct size. Apply adhesive to the back of the panel and install it as you did the other panels.
Finishing Touches
Once all the panels are installed, it's time to add the finishing touches. Here's what you need to do:
- Remove the Spacers: Once the adhesive has dried, remove the spacers from between the panels.
- Caulk the Seams: Use a caulk gun to apply a thin, even layer of caulk to the seams between the panels. This will help seal the gaps and prevent moisture from seeping in.
- Clean the Panels: Use a damp cloth to clean the panels and remove any excess adhesive or caulk.
- Install Baseboards and Trim: Install baseboards and trim around the perimeter of the wall to give it a finished look.
Conclusion
Installing SPC wall panels on a wooden wall is a relatively easy process that can be completed in a weekend. By following these steps and using the right tools and materials, you can transform your wooden wall into a stylish and durable surface that will last for years to come.
If you're interested in purchasing SPC wall panels or have any questions about the installation process, please don't hesitate to contact us. We're here to help you find the perfect panels for your project and provide you with the support and guidance you need to ensure a successful installation.
References
- Manufacturer's instructions for SPC wall panels and adhesive.
- DIY home improvement guides and tutorials.