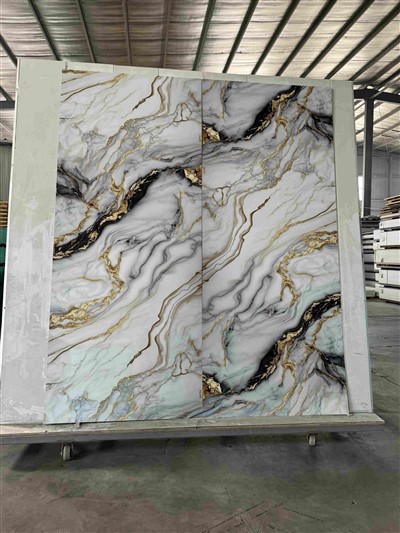
Installing a Glossy 3D Marble Sheet can transform the look of any space, adding a touch of elegance and sophistication. As a supplier of Glossy 3D Marble Sheet, I understand the importance of having the right tools for a successful installation. In this blog post, I will discuss the essential tools needed to install a Glossy 3D Marble Sheet and provide some tips on how to use them effectively.
Measuring Tools
Accurate measurements are crucial when installing a Glossy 3D Marble Sheet. Without proper measurements, the sheets may not fit correctly, leading to a less-than-perfect finish. Here are the measuring tools you'll need:
- Tape Measure: A good-quality tape measure is a must-have for any installation project. It allows you to measure the length, width, and height of the area where you'll be installing the marble sheet. Make sure to choose a tape measure that is at least 25 feet long for larger projects.
- Level: A level is used to ensure that the surface where you're installing the marble sheet is straight and even. This is important because an uneven surface can cause the sheets to warp or not lay flat. A bubble level is a simple and affordable option that works well for most projects.
- Square: A square is used to check for right angles and ensure that the corners of the installation area are square. This is important for creating a professional-looking finish. You can use a combination square or a framing square, depending on the size of the project.
Cutting Tools
Once you have your measurements, you'll need to cut the Glossy 3D Marble Sheet to fit the installation area. Here are the cutting tools you'll need:
- Utility Knife: A utility knife is a versatile tool that can be used to score and cut the marble sheet. Make sure to use a sharp blade and score the sheet several times to ensure a clean cut. You can then snap the sheet along the scored line to separate it.
- Jigsaw: A jigsaw is a power tool that can be used to make curved or irregular cuts in the marble sheet. Make sure to use a fine-tooth blade designed for cutting plastic or laminate materials. You can also use a jigsaw to cut out holes for outlets or other fixtures.
- Table Saw: A table saw is a powerful tool that can be used to make straight cuts in the marble sheet. Make sure to use a fine-tooth blade designed for cutting plastic or laminate materials. You can also use a table saw to rip the sheet into narrower strips if needed.
Adhesive Tools
To ensure that the Glossy 3D Marble Sheet stays in place, you'll need to use an adhesive. Here are the adhesive tools you'll need:


- Caulk Gun: A caulk gun is used to apply adhesive to the back of the marble sheet. Make sure to choose a caulk gun that is compatible with the type of adhesive you're using. You can also use a caulk gun to apply a bead of caulk around the edges of the sheet to seal it.
- Roller: A roller is used to smooth out the adhesive and ensure that the marble sheet is firmly attached to the surface. Make sure to use a roller that is the appropriate size for the sheet. You can also use a roller to remove any air bubbles that may be trapped between the sheet and the surface.
- Putty Knife: A putty knife is used to spread the adhesive evenly on the surface and to remove any excess adhesive. Make sure to choose a putty knife that is the appropriate size for the sheet. You can also use a putty knife to apply a thin layer of adhesive to the edges of the sheet to seal it.
Safety Tools
Installing a Glossy 3D Marble Sheet can be a dangerous task, so it's important to take the necessary safety precautions. Here are the safety tools you'll need:
- Safety Glasses: Safety glasses are used to protect your eyes from flying debris and dust. Make sure to choose safety glasses that fit properly and provide adequate protection.
- Gloves: Gloves are used to protect your hands from cuts, burns, and chemicals. Make sure to choose gloves that are appropriate for the task at hand. For example, if you're using a utility knife, you'll need gloves that provide cut resistance.
- Dust Mask: A dust mask is used to protect your lungs from dust and debris. Make sure to choose a dust mask that is rated for the type of dust you'll be working with. For example, if you're cutting the marble sheet, you'll need a dust mask that is rated for fine dust.
Tips for Using the Tools Effectively
Now that you know what tools you need to install a Glossy 3D Marble Sheet, here are some tips on how to use them effectively:
- Read the Instructions: Before using any tool, make sure to read the instructions carefully. This will help you avoid accidents and ensure that you're using the tool correctly.
- Use the Right Tool for the Job: Make sure to use the right tool for the task at hand. Using the wrong tool can damage the marble sheet or cause an accident.
- Keep the Tools Clean and Sharp: Make sure to keep the tools clean and sharp to ensure that they work properly. Dull tools can make the installation process more difficult and can damage the marble sheet.
- Take Your Time: Installing a Glossy 3D Marble Sheet takes time and patience. Don't rush the process, and make sure to take breaks when needed.
- Ask for Help: If you're not comfortable using a particular tool or if you have any questions, don't hesitate to ask for help. You can consult the manufacturer's instructions or ask a professional installer for advice.
Conclusion
Installing a Glossy 3D Marble Sheet can be a challenging but rewarding task. By having the right tools and following the tips outlined in this blog post, you can ensure a successful installation and transform the look of any space. If you're interested in purchasing a Glossy 3D Marble Sheet or have any questions about the installation process, please don't hesitate to contact us. We're here to help you every step of the way.
In addition to the Glossy 3D Marble Sheet, we also offer a Matt 3D Marble Sheet for those who prefer a more subdued look. Our sheets are made from high-quality materials and are available in a variety of colors and patterns to suit your needs.
If you're interested in learning more about our products or would like to discuss a specific project, please contact us. We look forward to working with you to create the perfect space.
References
- Manufacturer's instructions for the Glossy 3D Marble Sheet
- Online tutorials and videos on installing Glossy 3D Marble Sheets
- Professional installer's advice and experience